 老徐小屋
老徐小屋编译过程
第一次编译
Lean 大的仓库下,已经把过程写的很清楚,小白如果没有添加太多的 luci app,导致依赖有冲突,基本上都可一次成功。原文可以在仓库看到。
以下是根据 Lean 大,Vernesong 和 Lienol 仓库的介绍,将 Openclash 和 Passwal 的源加入原版 lede,并进行编译。
2020 年 8 月 19 日更新加入了其他一些比较有用的组件
首先要注意:
- 不要用 root 用户 git 和编译!!!
- 国内用户编译前最好准备好梯子
- 默认登陆IP 192.168.1.254, 密码 password
- 2020年9月10日起固件默认登录IP更改为 192.168.1.254 默认密码不变
编译过程如下:
首先装好 Ubuntu 64bit,推荐 Ubuntu 14 LTS x64
1.编译环境
1.1 系统要求
系统环境是 Linux 或者 drawin,虚拟机或者物理机都行,例如 wsl 和 vm。系统选择桌面版或者服务器版,有无 GUI(图形化界面)都可以,不影响编译。我推荐使用 Ubuntu LTS x64 和 Debian 11。编译不要使用 root 用户!会导致编译失败。
1.2 硬件要求
cpu 当然是越强越好,内存 4G 起步,硬盘 64G 起步。
1.3 必须软件包
在 ubantu 的桌面,打开右键菜单,在菜单中选择在终端打开。如果是无 GUI 的 Linux,SSH 连接或者后台直接输入命令也是可以的。
按序输入以下命令。
更新软件包列表。
|
1 |
| sudo apt update |
|
1 |
更新软件包。
|
1 |
| sudo apt full-upgrade -y |
|
1 |
安装软件包。
|
1 |
| sudo apt install -y ack antlr3 aria2 asciidoc autoconf automake autopoint binutils bison build-essential \ | |
| bzip2 ccache cmake cpio curl device-tree-compiler fastjar flex gawk gettext gcc-multilib g++-multilib \ | |
| git gperf haveged help2man intltool libc6-dev-i386 libelf-dev libglib2.0-dev libgmp3-dev libltdl-dev \ | |
| libmpc-dev libmpfr-dev libncurses5-dev libncursesw5-dev libreadline-dev libssl-dev libtool lrzsz \ | |
| mkisofs msmtp nano ninja-build p7zip p7zip-full patch pkgconf python2.7 python3 python3-pip libpython3-dev qemu-utils \ | |
| rsync scons squashfs-tools subversion swig texinfo uglifyjs upx-ucl unzip vim wget xmlto xxd zlib1g-dev |
|
1 |
建议先更换软件源再安装软件包,部分软件包在外网,容易安装失败。我是每个软件包单独安装的,命令如下。
|
1 |
| sudo apt -y install ack | |
| sudo apt -y install antlr3 | |
| sudo apt -y install aria2 | |
| sudo apt -y install asciidoc | |
| sudo apt -y install autoconf | |
| sudo apt -y install automake | |
| sudo apt -y install autopoint | |
| sudo apt -y install binutils | |
| sudo apt -y install bison | |
| sudo apt -y install build-essential | |
| sudo apt -y install bzip2 | |
| sudo apt -y install ccache | |
| sudo apt -y install cmake | |
| sudo apt -y install cpio | |
| sudo apt -y install curl | |
| sudo apt -y install device-tree-compiler | |
| sudo apt -y install fastjar | |
| sudo apt -y install flex | |
| sudo apt -y install gawk | |
| sudo apt -y install gettext | |
| sudo apt -y install gcc-multilib | |
| sudo apt -y install g++-multilib | |
| sudo apt -y install git | |
| sudo apt -y install gperf | |
| sudo apt -y install haveged | |
| sudo apt -y install help2man | |
| sudo apt -y install intltool | |
| sudo apt -y install libc6-dev-i386 | |
| sudo apt -y install libelf-dev | |
| sudo apt -y install libglib2.0-dev | |
| sudo apt -y install libgmp3-dev | |
| sudo apt -y install libltdl-dev | |
| sudo apt -y install libmpc-dev | |
| sudo apt -y install libmpfr-dev | |
| sudo apt -y install libncurses5-dev | |
| sudo apt -y install libncursesw5-dev | |
| sudo apt -y install libreadline-dev | |
| sudo apt -y install libssl-dev | |
| sudo apt -y install libtool | |
| sudo apt -y install lrzsz | |
| sudo apt -y install mkisofs | |
| sudo apt -y install msmtp | |
| sudo apt -y install nano | |
| sudo apt -y install ninja-build | |
| sudo apt -y install p7zip | |
| sudo apt -y install p7zip-full | |
| sudo apt -y install patch | |
| sudo apt -y install pkgconf | |
| sudo apt -y install python2.7 | |
| sudo apt -y install python3 | |
| sudo apt -y install python3-pip | |
| sudo apt -y install libpython3-dev | |
| sudo apt -y install qemu-utils | |
| sudo apt -y install rsync | |
| sudo apt -y install scons | |
| sudo apt -y install squashfs-tools | |
| sudo apt -y install subversion | |
| sudo apt -y install swig | |
| sudo apt -y install texinfo | |
| sudo apt -y install uglifyjs | |
| sudo apt -y install upx-ucl | |
| sudo apt -y install unzip | |
| sudo apt -y install vim | |
| sudo apt -y install wget | |
| sudo apt -y install xmlto | |
| sudo apt -y install xxd | |
| sudo apt -y install zlib1g-dev |
|
1 |
这一步和电脑安装软件的情况有关。可能会有报错,此时需根据报错日志来判断安装软件,如:
|
1 2 |
sudo apt-get install build-essential gcc g++ vim make cmake unzip python3-dev vim git perl wget patchelf gawk libncurses5-dev subversion zlib1g-dev m4 -y |
最后的-y表示yes,即同意安装;不用每次都重新输出Y来确认。
建议有报错后再安装即可,没必要一次性安装推荐的所有软件,减少对电脑磁盘的占用。
2.拉源码
在系统中找一个你喜欢的位置放源码,我选择的位置是/home/server。有一点要注意,存放源码的路径不能有中文和空格,有中文和空格会导致编译失败。在终端 cd 到 /home/server。本次教程使用的是 lean 的源码,也可以使用其他人的源码。
输入以下命令拉取源代码。
GitHub 的服务器在国外,拉源码难免会慢,甚至失败。可以使用梯子或者其他 GitHub 加速手段。
|
1 |
| git clone https://github.com/coolsnowwolf/lede |
|
1 |
3.第一次编译
拉完源码之后 cd lede 进入目录。、
缝合一些其他插件-里面有一些科学上网插件
原地址:https://github.com/kenzok8/openwrt-packages
添加下面代码复制到 lede源码根目录 feeds.conf.default 文件
以下命令按序执行。
更新订阅源的软件包。
|
1 |
| ./scripts/feeds update -a |
|
1 |
安装订阅源的软件包。
|
1 |
| ./scripts/feeds install -a |
|
1 |
进入图形化配置界面。
|
1 |
| make menuconfig |
|
1 |
执行完 make menuconfig 会打开一个页面,这个页面是配置openwrt的相关参数。例如选择处理器类型,处理器型号,路由版型,目标固件类型,插件等。
如果是用虚拟机或者ssh编译的话,在 make menuconfig 这步出错,非常有可能是你的软件窗口太小了,不能显示配置界面。
第一次编译先用默认配置。等编译成功之后再自定义自己的配置。在配置界面,方向键可以控制光标移动,按 Y 键选中,按 N 键取消选中,空格键也可以。按下 Enter 进入下一级目录,双击 Esc 键返回上一级菜单。选择 save 保存配置。
使用 make defconfig 命令可以根据编译环境生成配置,这个配置包含了一个对于编译环境的先决条件和依赖的检查,同时会安装缺失的组件并再次运行。
下载编译需要的 dl 库(国内请尽量全局梯子)。
|
1 |
| make -j8 download V=s |
|
1 |
dl 库下载完就可以开始编译了。
注意,为避免有的插件先编译出现问题,可以先运行一下代码
make package/feeds/luci/luci-base/compile V=99
PS:编译出 luci-base 后再编译就不会报错
|
1 |
| make -j1 V=s |
|
1 |
-j1 是编译用到的线程数,线程数越多编译越快,第一次编译推荐用单线程。
V=s 是输出详细日志,用于编译失败时寻找错误。使用默认配置肯定可以编译成功。
|
1 |
| # nproc 表示自动计算出你用编译机器的内核线程数 | |
| # -j$(nproc) 表示以编译机器的内核线程数编译。 | |
| make -j$(nproc) V=s |
|
1 |
很多编译失败的原因都是网络有问题,该下载的东西没有下载。出现错误自己根据日志排查原因,或者搜索引擎搜索。如果是某些文件没有下载成功,可以手动下载,放到对应文件夹。
第一次编译需要很长的时间,根据 CPU 的性能,时间在 2~3 个小时左右,之后再编译,可以增加线程数,只需要十几分钟就编译好。编译好的固件在 lede/bin/targets 。
4.再次编译步骤
进入 LEDE 目录。
|
1 |
| cd lede |
|
1 |
同步更新大雕源码。
|
1 |
| git pull |
|
1 |
更新订阅源的软件包。
|
1 |
| ./scripts/feeds update -a |
|
1 |
安装订阅源的软件包。
|
1 |
| ./scripts/feeds install -a |
|
1 |
清理旧文件(删除 /bin 和 /build_dir 目录中的文件,)。可选
旧文件还是删除掉好,万一认成新编译的文件,会耽误事。
|
1 |
| make clean |
|
1 |
清除编译配置和缓存(如果不改变配置,这步可以忽略。)rm -rf ./tmp 删除执行 make menuconfig 后产生的一些临时文件,包括一些软件包的检索信息,删除后会重新加载 package 目录下的软件包,若不删除会导致一些新加入的软件包不显示。
.config 若不删除,取消选择某些组件它的依赖组件不会自动取消,所以对于需要调整组件的情况下建议删除。可选
|
1 |
| rm -rf ./tmp && rm -rf .config |
|
1 |
如果更换架构或源码有重大更新,例如要从 x86_64 换到 MediaTek Ralink MIPS,或者源码版本更新建议执行以下命令深度清理 /bin 和 /build_dir 目录的中的文件以及 /staging_dir、/toolchain、/tmp 和 /logs 中的文件。(清除旧的编译产物、交叉编译工具及工具链等目录)可选
|
1 |
| make dirclean |
|
1 |
清除 OpenWrt 源码以外的文件。可选
除非是做开发,并打算 push 到 GitHub 这样的远程仓库,否则几乎用不到。此操作相当于 make dirclean 外加删除 /dl、/feeds 目录和 .config 文件。
|
1 |
| make distclean |
|
1 |
还原 OpenWrt 源码到初始状态。可选
如果把源码改坏了,或者长时间没有进行编译时使用。
|
1 |
| git clean -xdf |
|
1 |
进入图形化配置界面(按需求自己配置,不改变配置,这步可忽略)
|
1 |
| make menuconfig |
|
1 |
下载编译需要的 dl 库(国内请尽量全局梯子,不改变配置,这步可忽略)
|
1 |
| make download -j8 V=s |
|
1 |
开始编译
|
1 |
| make -j1 V=s |
|
1 |
5.杂项
5.1 修改软件包
源代码里的 feeds.conf.default 文件,保存着软件包订阅,格式如下:
|
1 |
| src-git Openclash https://github.com/vernesong/OpenClash | |
| src-git PassWall https://github.com/xiaorouji/openwrt-passwall | |
| src-git kenzo https://github.com/kenzok8/openwrt-packages |
|
1 |
如果源码自带的订阅没有你需要的软件,可以添加第三方订阅来获取。添加完订阅,在编译的时候需要更新和安装软件包,命令如下。添加一次,就执行一次命令。
|
1 |
| ./scripts/feeds update -a && ./scripts/feeds install -a |
|
1 |
5.2 检查dl库
这是查看 dl 目录下有没有 1k 以下的文件,按经验来说 1k 以下的文件,大概率没有下载完。如果有则重新下载。(注意一下文件类型,别误删了需要的文件,非 dl 就不管)
|
1 |
| find dl -size -1024c –exec ls -l {} \; |
|
1 |
如果存在这样的文件可以使用命令将它们删除,然后重新执行 make download 下载并反复检查,确认所有文件完整可大大提高编译成功率,避免浪费时间。
|
1 |
| find dl -size -1024c –exec rm -f {} \; |
|
1 |
在大雕源码的 commit 320adae6f63a7fdec770440e47f33821cf34128a 中添加了 Aria2c 的支持。使用多线程 Aria2c 下载 dl 源码数据包,更加稳定和快速,轻松跑满带宽并自动选择最佳下载点,非科学上网也能编译成功。
5.3 更改某些配置
5.3.1 默认管理地址
源代码里的 package/base-files/files/bin/config_generate 文件可以修改路由器的默认的管理地址。通过以下命令修改(假设修改成 192.168.5.1),也可以通过打开文件进行修改。
|
1 |
| sed -i ‘s/192.168.1.1/192.168.5.1/g’ package/base-files/files/bin/config_generate |
|
1 |
5.3.2 自定义固件大小
注意:编译丰富插件时,建议修改下面两项默认大小,留足插件空间。以 x86/64 为例
系统分区,驱动或插件多的话需要适当扩大这个分区。
Target Images —> (16) Kernel partition size (in MB)
默认是 (16) 建议修改 (256)
文件系统分区,基本可以理解为安装后默认的 /overlay 分区大小。
Target Images —> (160) Root filesystem partition size (in MB)
默认是 (160) 建议修改 (512)
5.3.3 单独添加软件包(参考喵斯基部落)
以 OpenAppFilter 为例,拉取源码到 package 目录之下
|
1 |
| git clone https://github.com/destan19/OpenAppFilterpackage/OpenAppFilter |
|
1 |
5.3.4 更改主题(参考喵斯基部落)
删除自定义源的主题
|
1 |
| rm -rf package/lean/luci-theme-argon |
|
1 |
拉取主题的源码
|
1 |
| git clone -b 18.06 https://github.com/jerrykuku/luci-theme-argon.git package/lean/luci-theme-argon | |
| git clone -b 18.06 https://github.com/kiddin9/luci-theme-edge package/lean/luci-theme-edge |
|
1 |
替换默认主题为 luci-theme-argon
|
1 |
| sed -i ‘s/luci-theme-bootstrap/luci-theme-argon/’ feeds/luci/collections/luci/Makefile |
|
1 |
5.3.5 安装 Samba4
默认安装的是 Samba36,默认是无法取消勾选。Samba36 不支持 Win8 之后使用的 Samba3 协议。如果直接勾选 Samba4,编译的时候会冲突。
Extra packages里取消勾选autosambaLuCI - Applications里取消勾选luci-app-samba,勾选luci-app-samba4。Network里取消勾选samba36-server。
autosmb 目前不支持 Smba4,插入设备后,手动去设置共享。在 服务 - 网络共享 里添加,然后记得执行 /etc/init.d/samba4 restart 重启服务,如果不重启,修改可能不生效。
最新的源码中 autosmb 支持且默认设置为 Smba4。
Samba 安装的是 4.x 版本,默认禁用了 SMB1 协议,对于一些老的操作系统(比如电视盒子)可能无法访问。在 Samba 的配置文件,加上两行配置。
|
1 |
| server min protocol = NT1 | |
| client min protocol = NT1 |
|
1 |
NT1 是协议版本,可选值在参考文档里列出了。
5.3.6 WAN 口多拨,分流和负载平衡可能会造成$$不正常,取消以下项目。
|
1 |
| luci-app-syncdial = null | |
| luci-app-mwan3helper = null | |
| luci-app-mwan3 = null |
|
1 |
5.3.7 luci-app-v2ray-pro 集成后默认打开。
|
1 |
| 默认情况下未添加任何节点,可能造成极少数网站无法正常打开的情况 (如 阿里云等),需手动关闭 V2Ray。 |
|
1 |
5.3.8 Kcptun 官方暂时没有适配 64 位设备 (arm64/aarch64) 的软件包。
|
1 |
| 如果编译 64 位设备(arm64/aarch64)固件时勾选 Kcptun 将会导致编译过程中找不到相应的软件包而报错。在 LuCI – Applications – luci-app-ssr-plus 中取消选择 Include Kcptun,在 Network 中取消对 Kcptun 的编译。 |
|
1 |
5.3.9 Kernel modules – Wireless Drivers 可能会产生冲突的软件包。
|
1 |
| kmod-libertas-sdio | |
| kmod-libertas-spi | |
| kmod-libertas-usb | |
| kmod-rsi91x-sdio | |
| kmod-rsi91x-usb |
|
1 |
5.3.10 添加 IPv6 支持。
|
1 |
| Extra packages —> ipv6helper |
|
1 |
lean openwrt 之外的 openwrt 可以参考这个链接。
5.3.11 制作 .config 文件,用于云编译固件(参考喵斯基部落)
根据自己的需求,调整系统组件。
|
1 |
| make menuconfig |
|
1 |
若在调整 OpenWrt 系统组件的过程有多次保存操作,建议先删除 .config.old 文件再继续操作。
|
1 |
| rm -f .config.old |
|
1 |
根据编译环境自动调整编译配置文件。
|
1 |
| make defconfig |
|
1 |
对比默认配置的差异部分生成配置文件。
|
1 |
| ./scripts/diffconfig.sh > seed.config |
|
1 |
5.3.12 添加适用于 VMware 或 PVE 的工具。
|
1 |
| # VMware | |
| Utilities —> open-vm-tools | |
| Utilities —> open-vm-tools-fuse | |
| # PVE | |
| Utilities —> Virtualization —> qemu-ga |
|
1 |
5.3.13 修改活动连接数
|
1 |
| # 16384 是原来的连接数,65535 是要修改成的连接数 | |
| sed -i ‘s/16384/65535/g’ package/kernel/linux/files/sysctl-nf-conntrack.conf |
|
1 |
5.3.14 修改x86启动等待时间
|
1 |
| # 5 是原来的等待时间,0 是要修改的等待时间。 | |
| sed -i ‘s/default “5”/default “0”/g’ config/Config-images.in |
|
1 |
5.3.15 修改 Linux 内核版本
|
1 |
| # 打开 LEDE 目录 /target/linux/ 架构 /Makefile 修改如下内容。 | |
| # 假设默认的内核版本为 5.15。 | |
| KERNEL_PATCHVER:=5.15 | |
| # 具体支持内核版本: | |
| include/kernel-version.mk | |
| # 或者设置下面的选项。 | |
| Global build settings ────Use the testing kernel version | |
| # 或者使用下面的命令修改,注意 Makefile 文件的路径。 | |
| sed -i ‘s/KERNEL_PATCHVER:=5.15/KERNEL_PATCHVER:=5.19/g’ ./target/linux/x86/Makefile |
|
1 |
5.3.16 去掉 busybox 的 IPV6 支持
|
1 |
| Base system —> | |
| <*> busybox………………………….. Core utilities for embedded Linux —> | |
| Networking Utilities —> | |
| [ ] Enable IPv6 support |
|
1 |
5.3.17 openwrt 修改默认语言为 zh_cn
|
1 |
| 文件在 feeds/luci/modules/luci-base/root/etc/config/luci | |
| 把 option lang auto 修改为 option lang zh_cn |
|
1 |
5.3.18 修改主机名为 2333
|
1 |
| 文件在 package/base-files/files/bin/config_generate | |
| 把 set system.@system[-1].hostname=‘OpenWrt’ 修改为 set system.@system[-1].hostname=‘2333’ |
|
1 |
5.3.19 修改时区为 CST-8
|
1 |
| 文件在 package/base-files/files/bin | |
| 把 set system.@system[-1].timezone=‘UTC’ 修改为 set system.@system[-1].timezone=‘CST-8’ |
|
1 |
5.3.20 修改标准时间
|
1 |
| 文件在 package/base-files/files/bin | |
| 在 set system.@system[-1].timezone= 的下面添加 set system.@system[-1].zonename=‘Asia/Shanghai’ |
|
1 |
5.3.21 修改无线名称 SSID
|
1 |
| 文件在 package/kernel/mac80211/files/lib/wifi/mac80211.sh | |
| 把 set wireless.default_radio${devidx}.ssid=OpenWrt 修改为 set wireless.default_radio${devidx}.ssid=2333 |
|
1 |
5.3.22 修改固件 Root 密码
|
1 |
| 文件在 package/base-files/files/etc/shadow | |
| 把密码添加到root:和:中间即可。 |
|
1 |
5.3.23 lean 源码相关
|
1 |
| lean 的源码,在编译时,有默认的设置。 | |
| 具体文件在 package/lean/default-settings/files/zzz-default-settings |
|
1 |
5.3.24 取消开机跑代码
|
1 |
| 不要选中 Use Console Terminal (in addition to Serial) | |
| 选项在 Target Images |
|
1 |
5.3.25 openwrt 安装 tailscale
在编译阶段勾选对应软件包即可。
|
1 |
| # TAILSCALE 和 TAILSCALED 都要勾选。 | |
| # 一般勾选 TAILSCALE 之后,都会默认勾选 TAILSCALED。 | |
| Network——VPN——TAILSCALE | |
| Network——VPN——TAILSCALED |
|
1 |
也可以在 openwrt 后台安装对应的软件包(TAILSCALE和TAILSCALED)。目前 tailscale 在 openwrt 上没有图形界面,需要靠命令行控制。
5.3.26 menuconfig界面详解
没说明的就默认。一般是用不上的,或者是可以顾名思义的。
- Target System:按照软路由的 cpu,选择 CPU 架构。
- Subtarget:按照软路由的 cpu,选择具体的 CPU 型号。
- Target Profile:选择具体的路由器型号。
- Target Images:对生成镜像的压缩格式、文件系统格式和镜像空间的设置,选择几个则编译完成之后就有几个格式的固件。ramdisk:顾名思义,就是将内存虚拟成硬盘,内存充裕的话可以打开,有效提升性能,默认不选。 Compression 是压缩等级(none 表示不压缩)。cpio.gz 和 tar.gz:镜像生成之后打包成压缩包的格式,压缩之后体积减少很多,方便分享。看需求勾选。ext4 和 squashfs:ext4 适用于大容量闪存,易于修改分区大小,没有恢复出厂设置的功能。squashfs 适用于小容量闪存,不可修改分区大小,有恢复出厂设置的功能。一般是选择只读文件系统(squashfs)。想了解更多的内容,自行搜索。
Build GRUB images 和 Build GRUB EFI images:顾名思义,传统启动还是 efi 启动。
Title for the menu entry in GRUB:进入后台看到的由很多字符组成 openwrt。可以自定义你想要的字符。(大概)
Build LiveCD image (ISO)
Build PVE/KVM image files (QCOW2)
Build VirtualBox image files (VDI)
Build VMware image files (VMDK)
Build Hyper-V image files (VHDX)
GZip images
上面几个是编译出的镜像格式,前面 5 个是虚拟机使用的,选择几个,最后编译出来几个,按需选择。Kernel partition size (in MB):内核分区大小 (单位MB),也就是系统分区,驱动或插件多的话需要适当扩大这个分区。
Root filesystem partition size (in MB):,根文件系统分区大小 (单位 MB),文件系统分区,基本可以理解为安装后默认的
/overlay分区大小。12 和 13 组成了固件的体积Root partition on target device:根文件系统所在分区位置。默认值为
/dev/sda2,没有特殊需求,默认就好不用动。Make /var persistent:持久化
/var,开启后重启软路由/var下内容会保留。 没说明的就默认。一般人用不上,或者是可以顾名思义的。 - Global build settings:全局构建设置。 这里的选项默认就好,基本不用动。
- Advanced configuration options (for developers) :和我们没啥关系。
- Build the OpenWrt Image Builder :和我们没啥关系。
- Build the OpenWrt SDK :和我们没啥关系。
- Package the OpenWrt-based Toolchain :和我们没啥关系。
- Image configuration:和我们没啥关系。
- Base system:设置基础系统 默认选项就足够用了,除非有特殊需求。需要 ipv6 要选择 dnsmasq-full 的 build with dhcpv6 support选择默认的 dnsmasq-full 即可,另外 2 个 dnsmasq 切记不要选。(我也不知道为什么)zram-swap:压缩内存,把部分数据压缩以节省内存,拿时间换空间,对软路由怎么说都有 1G 内存,肯定足够的。默认不选择。
- Administration:管理htop:进程浏览器。netdata:实时监控。netatop:网络连接计数。 其他的选项我保持默认。
- Boot Loaders:启动加载器,默认就好
- Development:开发:默认就好
- Extra packages:扩展软件包,提供 ipv6 支持,usb 自动挂载等,按需选择。ipv6helper:ipv6的相关组件。autosamba:samba 文件共享,只支持 samba3,选择 samba4 时不勾选。autocore:多核 NAT,自动省电降频,自动睿频和超线程这些应该在这里面,可以去掉。 其他的默认就好, k3wifi 应该是 k3 的无线驱动。
- Firmware:相关硬件的驱动,有 amd cpu 的微码,amd 显卡驱动,网卡的驱动。按需选择。
- Fonts:里面是字体,随意选择或者不选都行。
- Kernel modules:内核模块,按需选择,很多选项是软路由才会用到的。Block Devices:块设备支持,默认也行。CAN Support:CAN 支持,默认就好。Cryptographic API modules:默认就好。
Filesystems:文件系统支持,按需选择,或者默认。
FireWire support:火线支持,默认就好。
Hardware Monitoring Support:硬件监控模块,默认就好。
I2C support:i2c 支持,默认就好。
Industrial I/O Modules:工业 I/O 模块,应该是工控机需要的,默认不勾选。
Input modules:输入模块,如果没有特殊需要,默认就好
LED modules:led 模块,我的软路由没这玩意,默认不选。
Libraries:库,默认就好
Native Language Support:语言编码支持,加上cp936(简体中文)就好。
Netfilter Extensions:netfilter 扩展,不懂的话,默认就好了。
Network Devices:有线网卡支持,按需选择。
Network Support:网络支持,按需选择,不懂就默认,默认的足够一般人使用。
Other modules:其他模块,不懂就默认,默认的足够一般人使用。
PCMCIA support:PCMCIA 支持,默认就好。
SPI Support:SPI支持,默认就好,很少看到设备有spi。
Sound Support:音频支持,默认不选,谁的路由器还带个音响。
USB Support:USB 设备支持,按需选择。
Video Support:视频支持,按需选择,我不需要 gpu 渲染画面,就不勾选。
Virtualization:虚拟化,kvm 虚拟机可能会用到,我用 esxi,所以不勾选。
Voice over IP:不了解这东西,默认不选。
W1 support:不了解这东西,默认不选。
WPAN 802.15.4 Support:WPAN 802.15.4 支持,一般用不上,默认不勾选。
Wireless Drivers:无线网卡驱动,按需选择。 没说明的都是很少用的,有需要自己查资料吧。
- Languages:这里应该是开启某些编程语言的支持,一般用不上,默认不选。
- Libraries:库,默认就好,里面东西多
- Luci: Collections:有docker和nginx,ssl,按需选择。luci #添加luci (web界面管理)Modules:不懂就默认。Translations —> Simplified Chinese (zh-cn) #新版本中文包Applications:我们需要的软件就在这里了,按需安装。Themes:主题。
Protocols:默认就好。
Libraries:默认就好。
Translations —> luci-i18n-chinese #添加 luci 的中文语言包
- Mail:一般用不上,默认不勾选。
- Multimedia:和多媒体有关的软件包,按需选择。
- Network:网络有关的软件包,按需选择。
- Sound:音频有关软件包,默认不勾选,
- Utilities:实用程序,按需选择。
- Virtualizationqemu-ga
Utilities —> open-vm-tools #适用于 VMware 的 VM Tools
Utilities —> open-vm-tools-fuse #适用于 VMware 的 VM Tools
Utilities —> Compression —><*>unrar(解压缩工具)
Utilities —> Compression —><*> unzip(解压缩工具)
Utilities —> Compression —><*> zip(解压缩工具)
Utilities —> Filesystem —><*> badblocks(支持 ext2 文件系統)
Utilities —> Filesystem —><*> e2fsprogs(支持 ext2/ext3/ext4 格式化工具)
Utilities —> disc —><*> blkid(可以列出分区类型卷标等)
Utilities —> disc —><*> fdisk(分区工具)
Utilities —> disc —><*> lsblk(列出块设备,还能显示它们之间的依赖关系)
Utilities —><*> bzip2(解压缩工具)
Utilities —><*> lrzsz(上传下载工具)
Utilities —><*> restorefactory(reset 键支持(长按 5 秒以上就可以恢复固件默认设置))
Utilities —><*> wifitoggle(添加一键开关无线(按一下 WPS 键放开,无线就打开或者关闭))
- Xorg:默认就好
**其它未说明的:一般无需修改,保持默认即可。
**以下供参考
添加高速数据支持
|
1 |
| Kernel modules —> Block Device —><*> kmod-block2mtd | |
| Kernel modules —> Block Device —><*> kmod-scsi-core | |
| Kernel modules —> Block Device —><*> kmod-scsi-generic(usb 转 IDE ,SATA) |
|
1 |
添加硬盘格式支持
|
1 |
| Kernel modules —> Filesystems —><*> kmod-fs-ext4 | |
| Kernel modules —> Filesystems —><*> kmod-fs-nfs | |
| Kernel modules —> Filesystems —><*> kmod-fs-nfs-common | |
| Kernel modules —> Filesystems —><*> kmod-fs-ntfs (只读) | |
| Kernel modules —> Filesystems —><*> kmod-fs-vfat | |
| Kernel modules —> Filesystems —><*> kmod-fuse | |
| Utilities —>Filesystem —><*> ntfs-3g (比 ntfs 更好用,但 CPU 占用略高) |
|
1 |
添加SD卡支持
|
1 |
| Kernel modules —> Other modules —><*> kmod-mmc | |
| Kernel modules —> Other modules —><*> kmod-sdhci | |
| Kernel modules —> Other modules —><*> kmod-sdhci-mt7620 |
|
1 |
添加编码支持
|
1 |
| Kernel modules —> Native Language Support —><*> kmod-nls-cp437 (FAT-fs 文件系統需要 cp437 支持) | |
| Kernel modules —> Native Language Support —><*> kmod-nls-iso8859-1 | |
| Kernel modules —> Native Language Support —><*> kmod-nls-cp936 | |
| Kernel modules —> Native Language Support —><*> kmod-nls-utf8 |
|
1 |
添加USB扩展支持
USB挂载
|
1 |
| Base system —> <*> block-mount |
|
1 |
|
1 |
| Base system —> <*> librt (libpthread 会自动选中) |
|
1 |
添加USB支持
|
1 |
| Kernelmodules —> USB Support —> <*> kmod-usb-hid(usb 键盘鼠标支持) | |
| <*> kmod-usb-ohci | |
| <*> kmod-usb-storage (usb storage 驱动) | |
| <*> kmod-usb-storage-extras | |
| <*> kmod-usb-uhci (usb 1.1 驱动) | |
| <*> kmod-usb2 | |
| <*> kmod-usb3 |
|
1 |
添加USB转串口驱动
|
1 |
| Kernel modules —> USB Support —><*> kmod-usb-acm(Lanuchpad,Arduino UNO 驱动) | |
| Kernel modules —> USB Support —><*> kmod-usb-serial | |
| <*> kmod-usb-serial-ch341 | |
| <*> kmod-usb-serial-cp210x | |
| <*> kmod-usb-serial-ftdi | |
| Kernel modules —> USB Support —><*> kmod-usb-serial-pl2303 |
|
1 |
添加打印驱动
|
1 |
| Kernel modules —> USB Support —><*> kmod-usb-printer |
|
1 |
5.4 LuCI Applications 添加应用说明
标注丢弃的,在 Applications 中移除了。
这个部分我在网上查资料写的参考的资料主要有恩山的 xtwz 和 happyzhang,月上柳梢free。
happyzhang 写的OpenWrt编译 menuconfig配置说明excel表格可以作为参考
luci-app-accesscontrol:访问时间控制。
luci-app-acme :Acme.sh HTTP 证书申请。
luci-app-acme :ACME 自动化证书管理环境。(丢弃)
luci-app-adblock:ADB 广告过滤。
luci-app-adbyby-plus:广告屏蔽大师Plus +。
luci-app-adbyby:广告过滤大师。(丢弃)
luci-app-adguardhome:AdGuard home 广告过滤。(Le 库以外的插件)
luci-app-adkill:广告过滤。(丢弃)
luci-app-advanced-reboot:Linksys 高级重启。
luci-app-advancedsetting:系统高级设置。(Le库以外的插件)
luci-app-ahcp:Ad-Hoc 配置协议(AHCP) ipv6 and 双栈 自动配置协议。(与某些插件冲突)
luci-app-airplay2:Apple AirPlay2 无损音频接收服务器。
luci-app-airwhu:锐捷 802.1X 认证客户端。
luci-app-aliddns :阿里DDNS客户端。(丢弃,集成至 ddns)
luci-app-aliyundrive-webdav:阿里云盘 WebDAV 服务。
luci-app-amule:aMule 下载工具。(与某些插件冲突)
luci-app-appfilter:应用过滤。
luci-app-argon-config:Argon 主题配置插件。(Le 库以外的插件)
luci-app-aria2: Aria2 下载工具。
luci-app-arpbind:IP 和 MAC 绑定。
luci-app-asterisk:Asterisk 电话服务器。
luci-app-attendedsysupgrade:参与式系统升级。
luci-app-autoipsetadder:IPSET 配置。
luci-app-autoreboot:计划重启。
luci-app-baidupcs-web:百度网盘下载管理。
luci-app-bcp38:BCP38。网络入口过滤。(不确定具体作用)
luci-app-beardropper:SSH 攻击防御。
luci-app-bird1-ipv4:对 Bird1-ipv4 的支持。
luci-app-bird1-ipv6:对 Bird1-ipv6 的支持。
luci-app-bird4:Bird 4。(未知)(丢弃)
luci-app-bird6:Bird 6。(未知)(丢弃)
luci-app-bmx6:BMX6路由协议。
luci-app-bmx7:BMX7路由协议。(丢弃)
luci-app-brook-server:brook服务端。
luci-app-caldav:联系人。(丢弃)
luci-app-cd8021x:802.1x 有线认证拨号。
luci-app-chinadns:ChinaDNS。
luci-app-chinesesubfinder:自动化中文字幕下载。
luci-app-cifs-mount:CIFS/SMB 挂载设置。
luci-app-cifsd:CIFS/SMB 网络共享。
luci-app-cifs:CIFS 服务器。
luci-app-cjdns:加密 IPV6 网络相关。
luci-app-clamav:ClamAV 杀毒软件。
luci-app-clash:Clash 客户端。(Le 库以外的插件)
luci-app-cloudflarespeedtest:自选优选 IP」测试 Cloudflare CDN 延迟和速度,获取最快 IP (IPv4 / IPv6)!另外也支持其他 CDN / 网站 IP。
luci-app-commands:Shell 命令模块。
luci-app-control-mia:根据 MAC 网络管控。
luci-app-control-speedlimit:限制某个客户端速度。
luci-app-control-weburl:网络过滤。
luci-app-cpufreq:CPU 性能优化调节。
luci-app-cpulimit:CPU 使用率限制。
luci-app-cshark:CloudShark 捕获工具。
luci-app-cupsd:Cups 打印服务器。
luci-app-dawn:分布式 AP 管理程序。
luci-app-ddnsto:LuCI support for ddnsto。
luci-app-ddns:动态域名 DNS。(集成阿里 DDNS 客户端)
luci-app-diag-core:core 诊断工具。
- luci-app-diskman:磁盘管理工具。Include btrfs-progs:新型的写时复制。 (COW)Include kmod-md-linear:RAID 驱动程序模块。(丢弃)Include kmod-md-raid456:RAID 4,5,6 驱动程序模块。(丢弃)
Include lsblk:lsblk 命令用于列出所有可用块设备的信息。
Include mdadm:mdadm 命令用于创建、管理、监控 RAID 设备的工具。
luci-app-dnscrypt-dnsforwarder:DNSForwarder 防 DNS 污染。
luci-app-dnscrypt-proxy:DNSCrypt 解决 DNS 污染。
luci-app-dnsfilter:DNSFilter 基于 DNS 的广告过滤。
luci-app-dnsforwarder:DNSForwarder 防 DNS 污染。
luci-app-dnspod:DNSPod 动态域名解析。(丢弃)
luci-app-docker:Docker 容器。
luci-app-dockerman:DockerMan。
luci-app-dump1090:民航无线频率。(不确定具体作用)
luci-app-dynapoint:DynaPoint。(不确定具体作用)
luci-app-e2guardian:Web 内容过滤器。
luci-app-easymesh:简单 MESH。(可有线+无线回程)
luci-app-easyupdate:简单升级。
luci-app-emby:Emby。
luci-app-excalidraw:LuCI support for Excalidraw。
luci-app-eqos:基于 IP 地址限速。(Le 库以外的插件)
luci-app-firewall:防火墙。
luci-app-familycloud:家庭云盘。
luci-app-fileassistant:文件管理助手。(Le 库以外的插件)
luci-app-filebrowser:文件浏览。
luci-app-filetransfer:文件传输。(可 web 安装 ipk 包)
luci-app-flowoffload:Turbo ACC 网络加速。(集成 FLOW,BBR,NAT,DNS(丢弃,移至 TurboACC)
luci-app-freifunk-diagnostics:freifunk 组件 诊断。(未知)(丢弃)
luci-app-freifunk-policyrouting:freifunk 组件 策略路由。(未知)(丢弃)
luci-app-freifunk-widgets:freifunk 组件 索引。(未知)(丢弃)
luci-app-frpc:内网穿透 Frp 客户端。
luci-app-frps:内外穿透 Frp 客户端。
luci-app-fullconenat:LuCI support for FullConeNat。
luci-app-fwknopd:Firewall Knock Operator 服务器。
luci-app-gfwlist:GFW 域名列表。(丢弃)
luci-app-go-aliyundrive-webdav:阿里云盘 webdav。(文件管理/同步等)
luci-app-gogs:LuCI support for Emby。
luci-app-gpsysupgrade:LuCI for sysupgrade。
luci-app-gost:隐蔽的 https 代理。(Le 库以外的插件)
luci-app-gowebdav:GoWebDav。
luci-app-guest-wifi:WiFi 访客网络。
luci-app-haproxy-tcp:HAProxy 负载均衡-TCP。
luci-app-hd-idle:硬盘休眠。
luci-app-heimdall:LuCI support for heimdall。
luci-app-hnet:Homenet Status 家庭网络控制协议。
luci-app-homeassistant:LuCI support for homeassistant。
luci-app-homebridge:LuCI Support for homebridge。
luci-app-https-dns-proxy:通过 HTTPS 代理为 DNS 提供 Web UI。
luci-app-https_dns_proxy:DOH 配置。
luci-app-ikoolproxy:iKoolProxy。
luci-app-iperf:LuCI Support for iPerf3。
luci-app-iperf3-server:LuCI support for iPerf3。
luci-app-ipsec-server:IPSec VPN 服务。
luci-app-ipsec-virtuald:virtual 服务器 IPSec。
luci-app-ipsec-vpnd:VPN 服务器 IPSec。
luci-app-ipsec-vpnserver-manyusers:IPSec VPN 服务器。
luci-app-iptvhelper:IPTV 助手。
luci-app-istorex:IstoreX。
luci-app-jackett:LuCI support for jackett。
luci-app-jd-dailybonus:京东签到服务。
luci-app-jellyfin:LuCI support for jellyfin。
luci-app-koolproxyr:KP 去广告。
luci-app-lanraragi:LuCI support for LANraragi。
luci-app-linkease:LuCI support for linkease。
luci-app-kcptun:kcptun。
luci-app-kodexplorer:KOD 可道云私人网盘。(与 vnStat 冲突 )
luci-app-kooldns:VPN 服务器 ddns 替代方案。(丢弃)
luci-app-koolproxy:KP 去广告。(丢弃)
luci-app-ksmbd:KSMB 网络共享。
luci-app-LingTiGameAcc:灵缇加速器。
luci-app-lucky:LuCI Support for Dynamic lucky Client。
luci-app-lxc:LXC 容器管理。
luci-app-mail:LuCI Mail Configuration。
luci-app-memos:LuCI support for Memos。
luci-app-mentohust:Mentohust 锐捷拨号客户端。
luci-app-meshwizard:mesh 网络设置向导。(丢弃)
luci-app-minidlna:完全兼容 DLNA / UPnP-AV 客户端的服务器软件。
luci-app-minieap:Minieap 锐捷拨号客户端。
luci-app-mjpg-streamer:兼容 Linux-UVC 的摄像头程序。
luci-app-mosdns:LuCI Support for mosdns。
luci-app-music-remote-center:Luci for Music Remote Center。
luci-app-mmc-over-gpio:添加 SD 卡操作界面。(丢弃)
luci-app-mtwifi:MTWiFi 驱动的支持 。(丢弃)
luci-app-multiwan:多拨虚拟网卡。(丢弃,移至 syncdial)
luci-app-music-remote-center:PCHiFi 数字转盘遥控。
luci-app-mwan3helper:MWAN3 分流助手。
luci-app-mwan3:MWAN3 负载均衡。
luci-app-mymind:LuCI support for mymind。
luci-app-mwan:MWAN 负载均衡。(丢弃)
luci-app-mwol:网络唤醒。 (MQTT 协议)
luci-app-n2n_v2:N2N 内网穿透,N2N v2 VPN 服务。
luci-app-n2n:N2N 内网穿透,N2N VPN 服务。
luci-app-nastools:LuCI support for nastools。
luci-app-natter:LuCI Support for Natter。
luci-app-naiveproxy:Naiveproxy 客户端。
luci-app-nat6-helper:Ipv6-Nat6 帮手。
luci-app-netdata:Netdata 实时监控。(图形化)
luci-app-netkeeper-interception:LuCI Support for Netkeeper-Interception。
luci-app-netspeedtest:内外网测速。
luci-app-nextcloud:LuCI support for nextcloud。
luci-app-nfs:NFS 网络共享。
luci-app-nft-qos:QOS 流控 Nftables 版。
luci-app-nginx-pingos:PingOS 流媒体服务器。
luci-app-ngrokc:Ngrok 内网穿透。(丢弃)
luci-app-njitclient:南京工程学院 802.1X 客户端。
luci-app-nlbwmon :网络带宽监视器。
luci-app-noddos:NodDOS Clients,阻止 DDoS 攻击。
luci-app-npc:LuCI support for NPS Client(NPC)。
luci-app-nps:内网穿透 nps。
luci-app-ntpc:NTP时间同步服务器。
luci-app-oaf:Open App Filter Module。
luci-app-ocserv:OpenConnect VPN 服务。
luci-app-ocserv:OpenConnect VPN 服务。(丢弃)
luci-app-oled:OLED 配置。
luci-app-olsr-services:OLSR 服务器。
luci-app-olsr-viz:OLSR 可视化。
luci-app-olsr:OLSR 配置和状态模块。
luci-app-omcproxy:LuCI support for omcproxy。
luci-app-onliner:在线客户端。
luci-app-openclash:运行在 OpenWrt 上的 Clash 代理客户端。
luci-app-openvpn-server:易于使用的 OpenVPN 服务器 Web-UI。
luci-app-openvpn:OpenVPN 客户端。
luci-app-owntone:LuCI support for Owntone。
luci-app-oscam:OSCAM 服务器。(丢弃)
luci-app-p910nd:打印服务器模块。
luci-app-packet-capture:Packet capture application。
luci-app-pagekitec:Pagekitec 内网穿透客户端。
- luci-app-passwall:科学上网。(Li 大佬插件)Iptables Transparent Proxy:透明代理 。Nftables Transparent Proxy:透明代理 。Include Brook:Brook代理。(跨平台强加密且不可检测代理)
Include ChinaDNS-NG:防污染 DNS 服务。
Include Haproxy:HAProxy 负载均衡。
Include Hysteria:Hysteria 双边加速工具。
CInclude NaiveProxy:NaiveProxy 代理。(Chrome 网络堆栈伪装流量)
Include Shadowsocks Libev Client:SS Libev 客户端。(轻量级)
Include Shadowsocks Libev Server:SS Libev 服务端。(轻量级)
Include Shadowsocks Rust Client:SS Rust 客户端。(负载均衡/探测延迟)
Include Shadowsocks Rust Server:SS Rust 服务端。
Include ShadowsocksR Libev Client:SSR Libev 客户端。(轻量级)
Include ShadowsocksR Libev Server:SSR Libev 服务端。(轻量级)
Include Simple-Obfs (Shadowsocks plugin):simple-Obfs 简单混淆工具。(Nginx)
Include Trojan_GO:Trojan_GO 代理。(直接模仿 HTTPS 协议)
CInclude Trojan_Plus:Trojan_Plus 代理。(直接模仿 HTTPS 协议)
Include V2ray:V2Ray 代理。
Include V2ray_Geodata
CInclude v2ray-plugin (Shadowsocks plugin):SS V2ray 插件。(WebSocket+TLS )
Include Xray:Xray 代理。(XTLS)
lnclude Xray-Plugin (Shadowsocks Plugin) :SS Xray 插件。(WebSocket+TLS )
- luci-app-passwall2:科学上网。(Li 大佬插件)Include Brook:Brook代理。(跨平台强加密且不可检测代理)Include Hysteria:Hysteria 双边加速工具。Include IPv6 Nat:IPv6 Nat。
CInclude NaiveProxy:NaiveProxy 代理。(Chrome 网络堆栈伪装流量)
Include Shadowsocks Libev Client:SS Libev客户端。(轻量级)
Include Shadowsocks Libev Server:SS Libev服务端。(轻量级)
Include Shadowsocks Rust Client:SS Rust客户端。(负载均衡/探测延迟)
Include ShadowsocksR Libev Client:SSR Libev客户端。(轻量级)
Include ShadowsocksR Libev Server:SSR Libev服务端。(轻量级)
Include Simple-Obfs (Shadowsocks plugin):simple-Obfs 简单混淆工具。(Nginx)
Include V2ray:V2Ray 代理。
CInclude v2ray-plugin (Shadowsocks plugin):SS V2ray 插件。(WebSocket+TLS )
luci-app-penpot:LuCI support for Penpot。
luci-app-photoprism:LuCI support for PhotoPrism。
luci-app-phtunnel:LuCI Support for the PHTunnel。
luci-app-plex:LuCI support for Plex。
luci-app-polipo:Polipo 代理。(是一个小型且快速的网页缓存代理)
luci-app-poweroff:LuCI Support of PowerOff Router。
luci-app-poweroffdevice:LuCI support for poweroffdevice Router。
luci-app-pppoe-relay:PPPoE NAT穿透 点对点协议。(PPP 客户端)
luci-app-pppoe-server:PPPoE NAT穿透 点对点协议。(PPP 服务端)
luci-app-pptp-server:PPTP VPN 服务器。
luci-app-privoxy:Privoxy 网络代理。(带过滤无缓存)
luci-app-ps3netsrv:PS3 NET 服务器。(用于加载蓝光/游戏 ISO/PKG)
luci-app-pushbot:全能推送。(钉钉推送,企业微信推送,Bark,PushPlus 推送)
- luci-app-qbittorrent:BT下载工具。(qBittorrent)Build Version Selection (Static Build) —> Static Build:选择静态编译版本。Build Version Selection (Static Build) —> Dynamic Build:选择动态编译版本。
- luci-app-qbittorrent-simple:BT下载工具。(qBittorrent)Build Version Selection (Static Build) —> Static Build:选择静态编译版本。Build Version Selection (Static Build) —> Dynamic Build:选择动态编译版本。
luci-app-qosv4:QoS V4 流控。
luci-app-qos :QoS 流控。
luci-app-quickstart:LuCI support for quickstart。
luci-app-radicale :CalDAV/CardDAV 同步工具。
luci-app-ramfree:释放内存。
- luci-app-rclone:命令行云端同步工具。Include rclone-webui:Rclone 界面。Include rclone-ng (another webui):Rclone 另一个界面。Include fuse-utils (mount cloud storage):fuse-utils。(挂载云存储)(丢弃)
luci-app-rebootschedule:更好的计划任务。
luci-app-redsock2:科学上网。
luci-app-rp-pppoe-server:Roaring Penguin PPPoE Server 服务器。
luci-app-samba4:网络共享。(Samba4)
luci-app-samba:网络共享。(Samba)
luci-app-scutclient:华南理工大学拨号客户端。
luci-app-serverchan :server 酱,微信/Telegram 推送的插件。
luci-app-sfe:Turbo ACC 网络加速。(丢弃,移至TurboACC)
luci-app-shadowsocks-libes:SS-libev 服务端。
luci-app-shadowsocks-libev:Shadowsocks 客户端。
luci-app-shadowsocks:SS 科学上网。(丢弃)
luci-app-shairplay:支持 AirPlay 功能。
luci-app-shortcutmenu:LuCI Support for shortcutmenu
luci-app-shutdown:LuCI Support for Shutdown Target。
luci-app-siitwizard:SIIT 配置向导 SIIT-Wizzard。
luci-app-simple-adblock:简单的广告拦截。
luci-app-smartdns:SmartDNS 本地服务器。(丢弃)
luci-app-smartinfo:S.M.A.R.T 硬盘监控。
luci-app-smstool:3G 模块短信工具。
luci-app-snmpd:LuCI SNMPD Interface。
luci-app-socat:Socat 网络军刀。
luci-app-softethervpn5:SoftEther5 VPN 服务器,NAT穿透。
luci-app-softethervpn:SoftEther VPN 服务器,NAT 穿透。
luci-app-speedtest-web:LuCI support for speedtest-web。
luci-app-speederv2:UDPspeeder 工具。
luci-app-splash:Client-Splash 是无线 MESH 网络的一个热点认证系统。
luci-app-sqm:流量智能队列管理。(QOS)
luci-app-squid :Squid 代理服务器。
luci-app-ssocks:sSocks 服务器。
luci-app-ssr-libev-server:ShadowsocksR Libev 服务器。
luci-app-ssr-mudb-server:ShadowsocksR 多用户服务器。
- luci-app-ssr-plus :SSR 科学上网 Plus+(Le 大佬插件)
- Shadowsocks Client Selection (Shadowsocks-libev)
None
Shadowsocks-libev
Shadowsocks-rust
- Shadowsocks Server Selection (Shadowsocks-libev)
None
Shadowsocks-libev
Shadowsocks-rust
- V2ray-core Selection (Xray-core)
None
V2ray-core
Xray-core
SagerNet-core (An enhanced edition of v2ray-core)
Include ChinaDNS-NG
Include Hysteria
Include IPT2Socks
Include Kcptun:Kcptun 双边加速工具。
Include NaiveProxy:NaiveProxy 代理。(Chrome 网络堆栈伪装流量)
Include Redsocks2:Redsocks2 代理。(透明 TCP 定向 Socks/HTTPS 代理服务器)
Include Shadowsocks Simple Obfs Plugin:SS Simple-Obfs 混淆代理,配合 ss 使用。(Nginx)
Include Shadowsocks V2ray Plugin
Include ShadowsocksR Libev Client
nclude ShadowsocksR Libev Server
Include Trojan:Trojan 代理
luci-app-ssr-pro:SSR-Pro(丢弃)
luci-app-ssrserver-python:ShadowsocksR Python 服务器。
luci-app-statistics:流量监控工具。
luci-app-store:LuCI based ipk store。
luci-app-syncdial:多拨虚拟网卡。(原 macvlan)
luci-app-syncthing:Syncthing。
luci-app-systools:LuCI support for SysTools。
luci-app-sysuh3c:中山大学东校区联网客户端(SYSU H3C 802.1X)。
luci-app-tcpdump:LuCI support for tcpdump。
luci-app-tencentcloud-cos:LuCI luci-app-tencentcloud-cos app。
luci-app-tencentcloud-cos:COSFS Client for LuCI。
luci-app-tencentddns:LuCI Support for tencentddns。
luci-app-terminal:WEB 终端。
luci-app-timecontrol:时间控制。
luci-app-timewol:定时唤醒。
luci-app-tinyproxy:Tinyproxy 是 HTTP(S) 代理服务器。
luci-app-transmission :BT 下载工具。
luci-app-travelmate:旅行路由器。
luci-app-Trojan-server:Trojan 服务端。
luci-app-ttnode:Luci for ttnode Automatic collection Script。
luci-app-ttyd:网页终端命令行。
- luci-app-turboacc:Turbo ACC 网络加速。(支持 Fast Path 或者 硬件 NAT)Include Shortcut-FE:Shortcut-FE 流量分载。Include Shortcut-FE CM:硬件加速的 Shortcut-FE 流量分载。Include BBR CCA:BBR 拥塞控制算法提升 TCP 网络性能。
Include Pdnsd
Include DNSForwarder:DNS 防污染 Forwarder。
Include DNSProxy:DNS 防污染 Proxy。
luci-app-ubuntu:LuCI support for ubuntu。
luci-app-udp2raw:udp2raw 配置。
luci-app-udpxy:udpxy 做组播服务器。
luci-app-uhttpd:uHTTPd Web 服务器。
- luci-app-unblockmusic:解锁网易云灰色歌曲 2 合 1 新版本。UnblockNeteaseMusic Golang Version:Golang 版本。UnblockNeteaseMusic NodeJS Version:NodeJS 版本。
luci-app-unblockneteasemusic-go:解除网易云灰色歌曲。(合并)
luci-app-unblockneteasemusic-mini:解除网易云灰色歌曲。(合并)
luci-app-unbound:Unbound DNS 解析器。
luci-app-unifi:LuCI support for UnifiController。
luci-app-unishare:LuCI for UniShare。
luci-app-upnp:通用即插即用 UPnP。(端口自动转发)
luci-app-usb-printer:USB 打印服务器,通过局域网共享家里的打印机。
luci-app-usb3disable:USB3 禁用。
luci-app-uugamebooster:UU 网游加速器。
luci-app-v2ray-server:V2Ray 服务器。
luci-app-v2raya:LuCI support for v2rayA。
luci-app-vaultwarden:LuCI support for Vaultwarden。
luci-app-verysync:微力同步。
luci-app-vlmcsd:KMS 服务器。
luci-app-vnstat:vnStat 网络监控。(图表)(与 kodexplorer 冲突)
luci-app-vpn-policy-routing:VPN 策略路由。
luci-app-vpnbypass:Bypass VPN WebUI。
luci-app-vsftpd:FTP 服务器。
- luci-app-vssr:VSSR 科学上网。(je 大佬插件)Include Xray:Xray 代理。(XTLS)Include Trojan:Trojan 代理。(直接模仿协议 HTTPS)lInclude Kcptun:Kcptun 双边加速工具。
Include Shadowsocks Xray Plugin:SS Xray 代理。
Include ShadowsocksR Libev Server:SSR Libev 服务端。(轻量级)
Include Hysteria
luci-app-watchcat:断网检测功能与定时重启。
luci-app-webadmin:Web 管理页面设置。
- luci-app-webd:LuCI support for Webd NetdiskInclude webd Binary
luci-app-webrestriction:根据 MAC 网络管控。
luci-app-webshell:网页命令行终端。(丢弃)
luci-app-weburl:MAC 过滤。
luci-app-webdav:LuCI support for Webdav。
uci-app-wifidog:LuCI wifidog config。
luci-app-wifischedule:WiFi 计划。
luci-app-wireguard:VPN 服务器 WireGuard 状态。
luci-app-wireless-regdb:WiFi 无线。
luci-app-wizard:LuCI Support for wizard。
luci-app-wol:WOL 网络唤醒。
luci-app-wolplus:LuCI support for wolplus From sundaqiang。
luci-app-wrtbwmon:实时流量监测。
luci-app-wxedge:LuCI support for wxedge。
luci-app-xlnetacc:迅雷快鸟。
luci-app-xunlei:迅雷下载。
luci-app-xware3:迅雷下载。(32bit)
luci-app-zerotier:ZeroTier 内网穿透。
luci-i18n-dockerman-zh-cn:Docker 管理器。
luci-i18n-mosdns-zh-cn:MosDNS。
luci-i18n-vlmcsd-zh-cn:Kms。
luci-proto-ipv6:为 LuCI 提供 IPv6 设置选项。
ddns-scripts:DDNS 扩展。
ip6tables kmod-ip6tables kmod-ip6tables-extra:等提供 IPv6 防火墙。
iputils-traceroute6:为 IPv6 提供 traceroute 功能。(mtr 是个不错的支持双栈的traceroute 替代品,如果路由器存储空间够大的话)
kmod-ipt-nat6:提供 IPv6 NAT 支持。
kmod-tcp-bbr:启用 BBR。
kmod-usb-ledtrig-usbport:USB 读写 LED 灯支持。
kmod-usb-net-rndis:手机 USB 网络共享共享。
kmod-usb3:USB3.0 支持。
更新日志
2022/6/24:增加了修改活动连接数和修改x86启动时间的内容。
2022/8/17:增加了修改 Linux 内核版本的内容。软件包列表增加内容。
2022/8/31:修改了一处意思不明确的地方。增加了几个 LuCI Applications 说明。
2022/9/2:整理了排版,修改了一些有错误的地方。
2022/9/4:修改“修改 Linux 内核版本”的内容。
2022/9/8:增加了修改 Openwrt 配置的内容。
2022/9/10:修改 Openwrt 编译依赖,更新 autosmba 的相关内容。
2022/9/11:增加取消开机跑代码的相关内容。
2022/9/28:编译依赖增加 Aria2c。使用多线程 Aria2c 下载 dl 源码数据包。
2023/1/8:更新插件部分的内容。
2023/1/8:更新 VM 和 PVE 有关内容。
2023/1/30:更新 ipv6 和 tailscale 有关内容。
|
1 2 3 4 |
sudo apt-get update sudo apt-get -y install build-essential asciidoc binutils bzip2 gawk gettext git libncurses5-dev libz-dev patch python3 python2.7 unzip zlib1g-dev lib32gcc1 libc6-dev-i386 subversion flex uglifyjs git-core gcc-multilib p7zip p7zip-full msmtp libssl-dev texinfo libglib2.0-dev xmlto qemu-utils upx libelf-dev autoconf automake libtool autopoint device-tree-compiler g++-multilib antlr3 gperf wget swig rsync git clone https://github.com/coolsnowwolf/lede #下载源代码 cd lede #进入目录 |
将Lienol的Passwall加入编译源
|
1 2 3 4 |
vi feeds.conf.default #将以下加入至最后一行 src-git lienol https://github.com/xiaorouji/openwrt-passwall ESC :wq Enter #编辑完成后vim的保存并退出命令 |
手动Clone vernesong的OpenClash项目
|
1 2 3 4 5 6 7 8 |
mkdir package/luci-app-openclash cd package/luci-app-openclash git init git remote add -f origin https://github.com/vernesong/OpenClash.git git config core.sparsecheckout true echo "luci-app-openclash" >> .git/info/sparse-checkout git pull origin master git branch --set-upstream-to=origin/master master |
手动Clone 的SSR PLUS项目
Add new feed:
sed -i “/helloworld/d” “feeds.conf.default”
echo “src-git helloworld https://github.com/fw876/helloworld.git” >> “feeds.conf.default”
Pull upstream commits:
./scripts/feeds update helloworld
./scripts/feeds install -a -f -p helloworld
Remove
sed -i “/helloworld/d” “feeds.conf.default”
./scripts/feeds clean
./scripts/feeds update -a
./scripts/feeds install -a
注意,编译SSR PLUS 需要升级go到1.21以上
手动Clone vssr[Hello World]项目
|
1 2 |
cd /home/user/lede/package/lean/ && git clone https://github.com/jerrykuku/lua-maxminddb.git #git lua-maxminddb依赖 git clone https://github.com/jerrykuku/luci-app-vssr.git |
手动Clone luci-theme-argon魔改主题
|
1 2 3 |
cd /home/user/lede/package/lean rm -rf luci-theme-argon git clone -b 18.06 https://github.com/jerrykuku/luci-theme-argon.git |
手动Clone 京东多合一签到脚本luci-app-jd-dailybonus
2021 年 1 月,Lean 大仓库已 fork 了该脚本,不需要再自行添加。如需自行添加,可以参考如下旧的笔记。
|
1 2 3 4 5 6 |
cd /home/user/lede/package/lean/ git clone https://github.com/jerrykuku/node-request.git #git node-request 依赖 git clone https://github.com/jerrykuku/luci-app-jd-dailybonus.git make menuconfig #Check LUCI->Applications->luci-app-jd-dailybonus make package/lean/node-request/compile V=s #单独编译node-request 依赖 make package/lean/luci-app-jd-dailybonus/compile V=s #单独编译luci-app-jd-dailybonus |
手动Clone 行为管控
|
1 2 3 4 5 6 7 |
cd /home/user/lede/package git clone https://github.com/destan19/OpenAppFilter.git cd .. #在lede中编译,需要去除加速模块,可以直接删除或者make menuconfig不编译加速模块 rm package/lean/luci-app-flowoffload -fr rm package/lean/shortcut-fe/ -fr rm package/lean/luci-app-sfe/ -fr |
手动clone Dockerman
|
1 |
cd /home/user/lede/package/lean/ && git clone https://github.com/lisaac/luci-app-dockerman.git |
更新及安装软件源
|
1 2 |
cd /home/user/lede ./scripts/feeds update -a && ./scripts/feeds install -a |
固件配置
|
1 |
make menuconfig |
进去以后很多选项可能会一脸懵逼,我上传一份我自己的配置,机型是 X64,我给我的固件取了个名字 -“什么都有”。
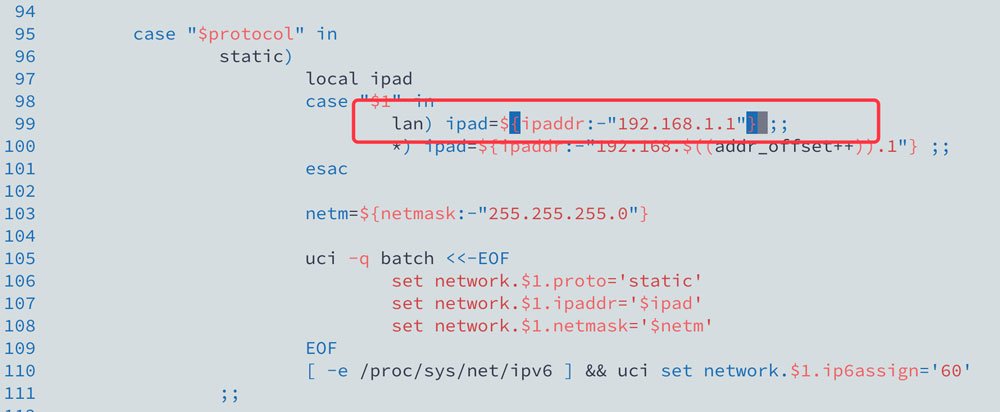
修改固件IP(可选项)
|
1 2 |
cd /home/user/lede nano package/base-files/files/bin/config_generate |
在如下位置,将默认的 192.168.1.1 更改为所需要的 IP
正式编译
|
1 2 |
make -j8 download V=s #下载dl库,国内请尽量全局科学上网 make -j1 V=s # -j1后面数字1是线程数。第一次编译推荐用单线程,即可开始编译你要的固件了。 |
第一次编译大约需要 4 至 6 小时,请耐心等待。
更新编译
在经过第一次编译后,以后再编译就比较简单且时间也会缩短至一小时内
|
1 2 3 4 5 6 7 8 9 10 11 12 13 14 15 16 17 18 19 |
cd lede #进入LEDE目录 git pull #同步更新大雕源码 cd package/luci-app-openclash && git pull #进入OpenClash目录并更新源码 cd /home/user/lede/package/lean/luci-app-vssr && git pull #进入luci-app-vssr目录并更新源码 cd /home/user/lede/package/lean/luci-theme-argon && git pull #进入luci-theme-argon目录并更新源码 cd /home/user/lede/package/lean/luci-app-jd-dailybonus && git pull #进入luci-app-jd-dailybonus目录并更新源码 cd /home/user/lede/package/OpenAppFilter && git pull #进入OpenAppFilter目录并更新源码 cd /home/user/lede/package/lean/luci-app-dockerman && git pull #进入Dockerman目录并更新源码 cd /home/user/lede #退回到lede目录 ./scripts/feeds update -a && ./scripts/feeds install -a #更新FEEDS #如有固件有大版本升级,建议清除编译配置和缓存;如无可跳过此步 rm -rf ./tmp && rm -rf .config #进入编译配置菜单 make menuconfig #n=线程数+1,例如4线程的I5填-j5,开始编译 make -j1 V=s |
Lienol Passwall (2020 年 5 月 1 日更新)
由于不可描述原因,Lienol 的 Passwall 已经不再公开源码,以后的编译,也不会自带 Passwall 插件,需要的可以在下面的成品分享中找到单独的 ipk,进行自行安装。分享中,上传的 passwall 版本为 “luci-app-passwall_3.6-41_all.ipk”.
编译完之后,openclash还需要安装内核。可以直接运行更新。也可以手工上传。
注意 下载下来的文件解压 然后根据提示改名
dev 路径为 内核路径:/etc/openclash/core/clash clash为文件名
tun 路径为 内核路径:/etc/openclash/core/clash_tun clash_tun为文件名
注意要给这2个文件777权限,否则clash读不出来会显示未知
软路由为intel的CPU时候,选择AMDX86-64这个内核
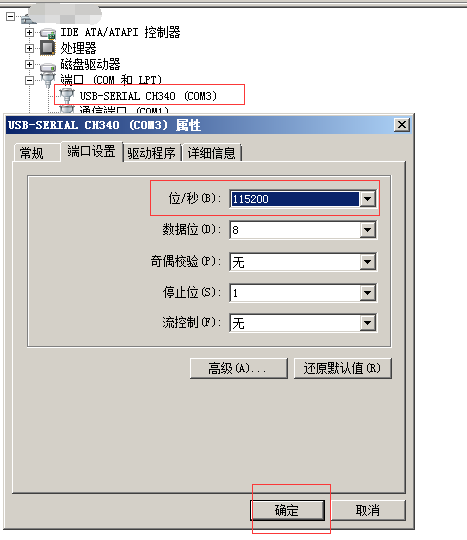
上传文件 Xshell
lrzsz是一个下使用zmodem协议的档案传输工具,Xshell支持此功能,服务器端安装lrzsz通过ssh连接可快速上传下载文件。
OpenWRT下lrzsz安装:
|
1
2
3
4
|
opkg updateopkg install lrzszln -s /usr/bin/lrz /usr/bin/rzln -s /usr/bin/lsz /usr/bin/sz |